Recycled Denim Bag

Recycle, re-purpose and re-use. Most of us have a stash of denim jeans – whether they are worn out, out of fashion or in the “too big” or “too small” piles, it always seems so wrong to throw them out. Here is a great project that recycles your old jeans and gives you something you can enjoy and use for years to come! You can make this carry bag any size you want – your loom width being the only restriction.

You will need:

Rigid Heddle Loom – any width, I used a 60cm (24”) loom
Reed – 7.5dpi (30/10)
Warp yarn – Ashford Unmercerised 5/2 cotton – I used white to match my handles
Weft – Denim jeans cut into strips. I used 3 pairs of large men’s jeans
Other – Handles, fabric for the lining, tapestry beater, sewing machine.

Heres how:

Making your yarn
To avoid any thick lumps in the weaving use just the fabric from the legs, cutting off the seams on both sides and the hem. 

You will have 4 pieces of fabric from each pair. Cut each of these into long strips about 1cm wide.

You can use each strip as is, by overlapping as you are weaving but I prefer to have one long “yarn” as I found it far quicker to weave with. I trimmed ends on an angle and used a quick zigzag stitch back and forth to sew the strips together.

Now you have a lovely ball of denim yarn to work with.

Warping

Warp your loom with the cotton, 5cm (2”) wider than you want your finished fabric.


Weaving

Weave a header about 2.5cm (1”) with the same cotton, beat with the tapestry beater after every third row.
VERY IMPORTANT – you do NOT need to have your warp under high tension. Remember to “be kind to you yarn, be kind to your loom and most importantly be kind to yourself”. If you have too much tension on your warp you will find it very difficult to change sheds, putting strain on your arms and shoulders as well as your yarn and loom.

Using your denim yarn, weave one row, gently push the weft in position with the reed – there is no need to worry about compacting it down tight at this point. Change sheds and weave another row, gently push into place with the reed and change sheds and now you will BEAT the weft into place with the tapestry beater. IMPORTANT – do not worry about the row of weft you just placed – you are looking to close the gaps in the previous rows.

Weave the next two rows, pushing them gently into place, change shed then beat with tapestry beater. Continue in this way until you almost reach the end, finish with another 2.5cm (1”) of cotton yarn compacted as you did in the beginning.


Hints

Hold the tapestry beater at the end of the handle and flick, bounce it on the weft, using the weight of the beater rather than trying to push with force.

It can be tricky to keep your edges nice and tidy, as your denim yarn will twist as it comes off your shuttle as you are weaving. You could take the time to arrange it neatly each time, but I took the lazy road and did not worry as I planned to sew the edges when finished.


Making up you bag

Remove fabric from the loom. Overlock or use a zigzag stitch to secure each end. If you have thick messy edges, cut and secure with over locker or zigzag stitch. Cut the lining fabric the same size as the denim fabric. Fold the denim in half right sides together (if you prefer one side to the other) and sew down each side. Fold corners out and sew across the corner. The closer the seam is to the corner the narrower your base will be. Mine was about 12cm (4 ¾”) across. Repeat for the lining. 

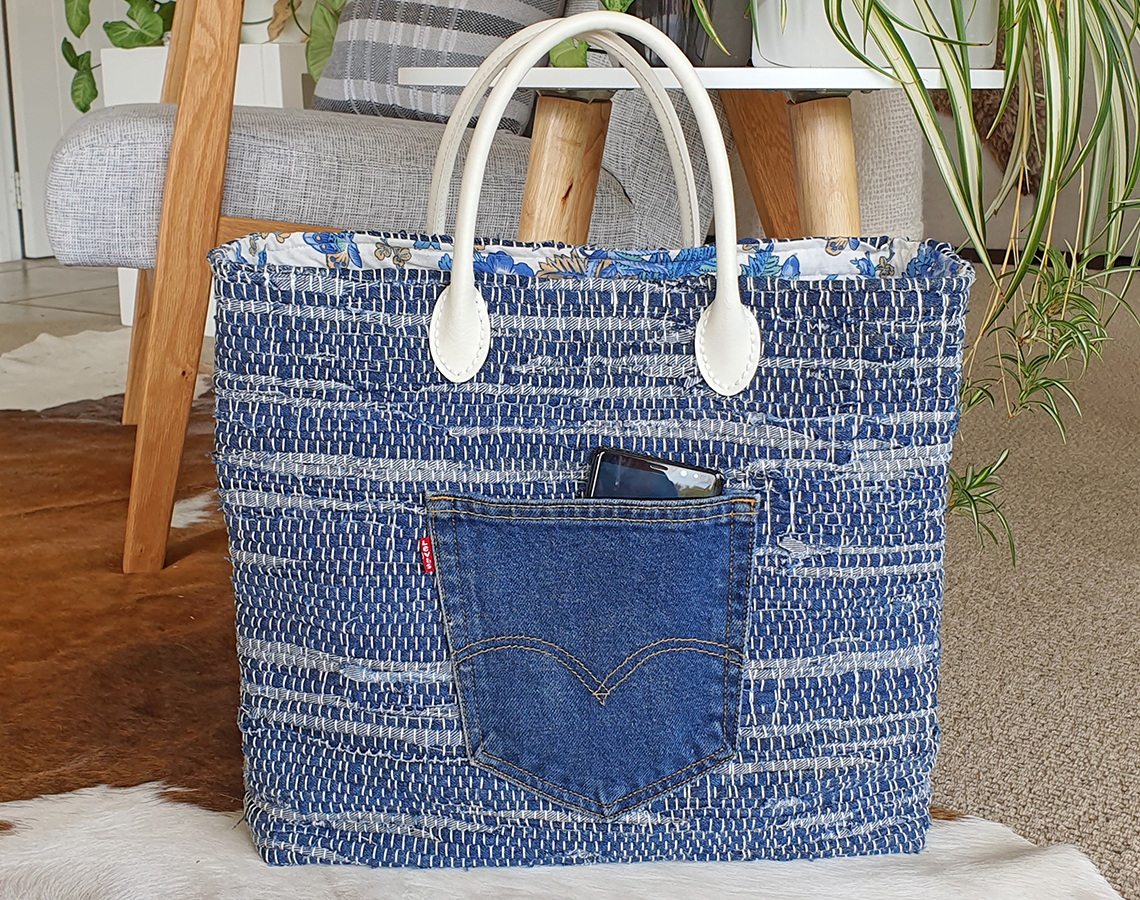
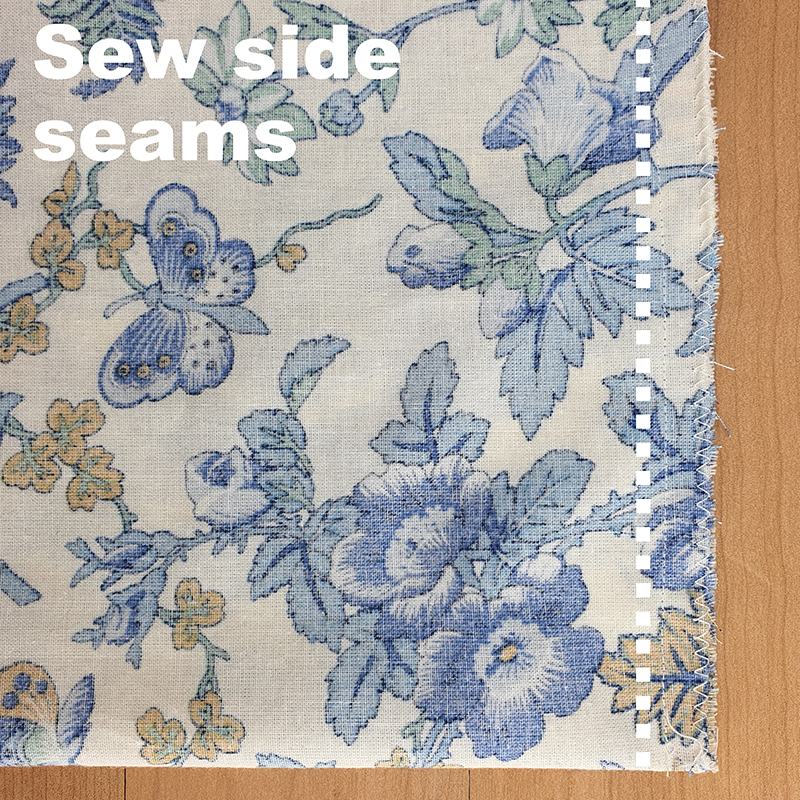
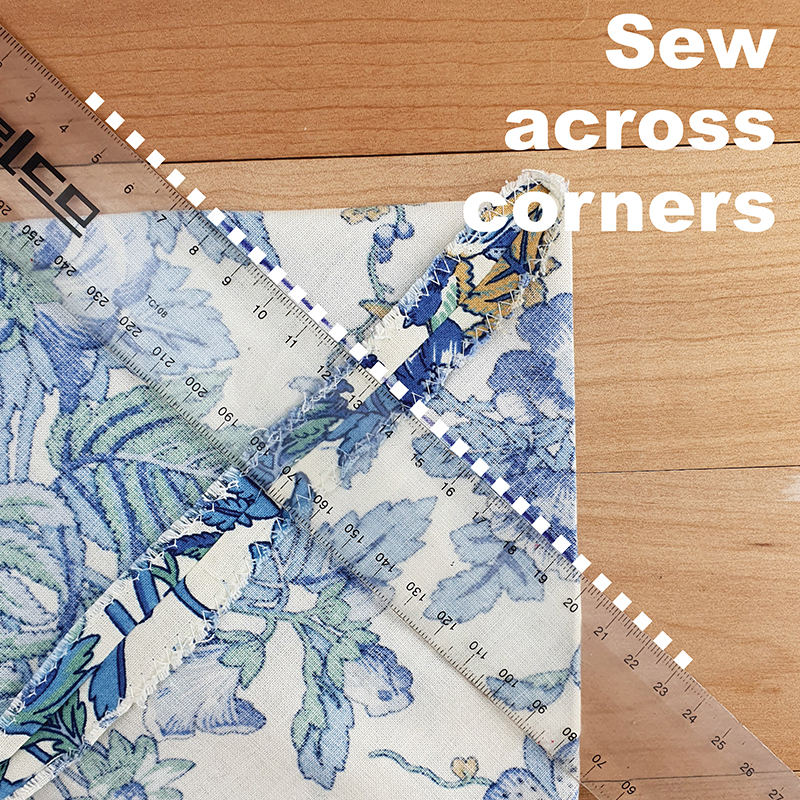
Place the denim bag inside the lining bag with right sides together. Sew around the top, leave a gap so you can pull the denim bag through the opening, then pull the lining through and tuck the lining inside the bag.  Fold and press the opening edge under and top stich completely around the top. I also added another row of top stitching about an inch below the top. Sew on handles and optional pockets. Load up with all your essentials – knitting, books, water (or wine), phone, earphones and you are ready to go!

Happy weaving!