Hemstitching
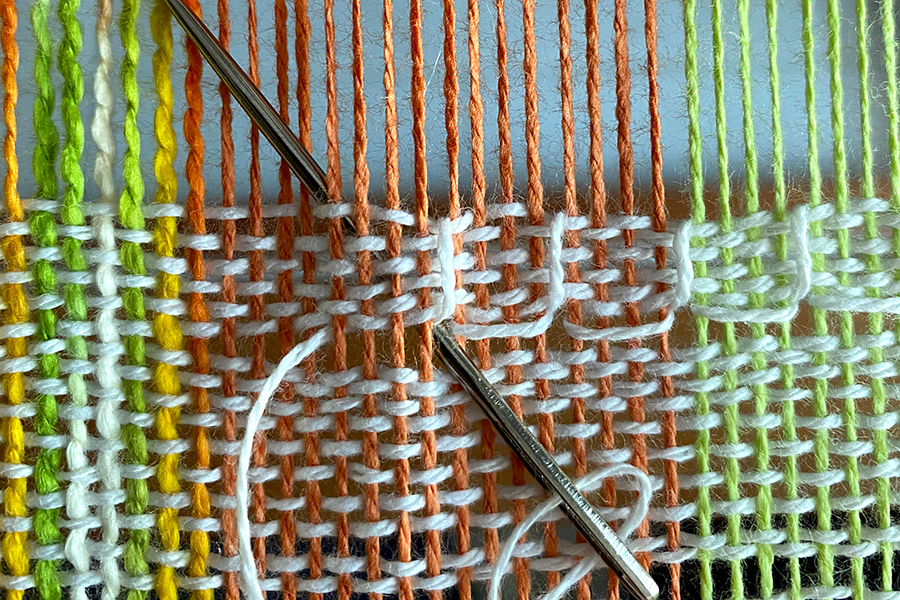
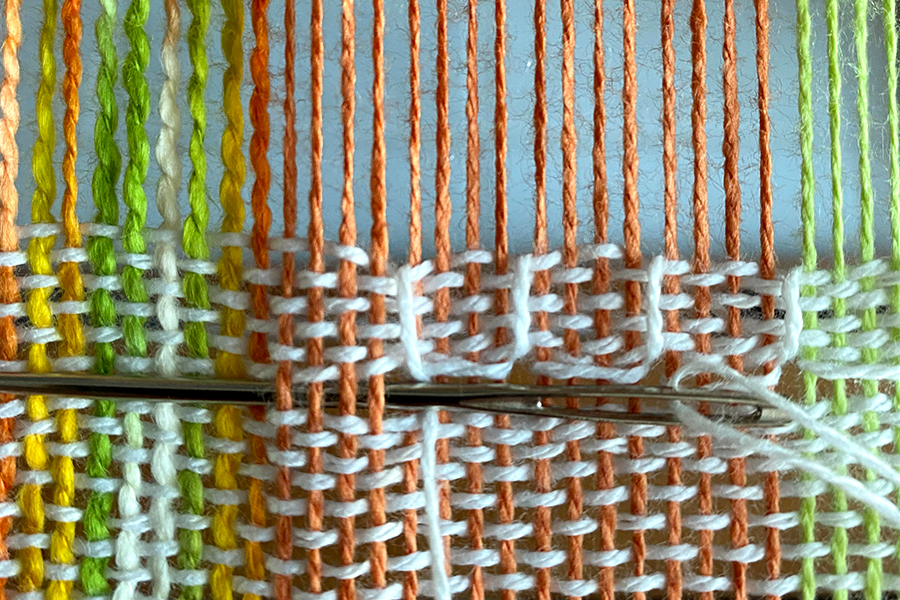
Hemstitching is a way you can secure the ends of your weaving without having to sew or tie knots in the warp ends. There are several variations of hemstitching – in the video below I show the method I use. I have also included instructions for some other methods and also how you can use hemstitching decoratively on your weaving.
Happy weaving!

Kate
-
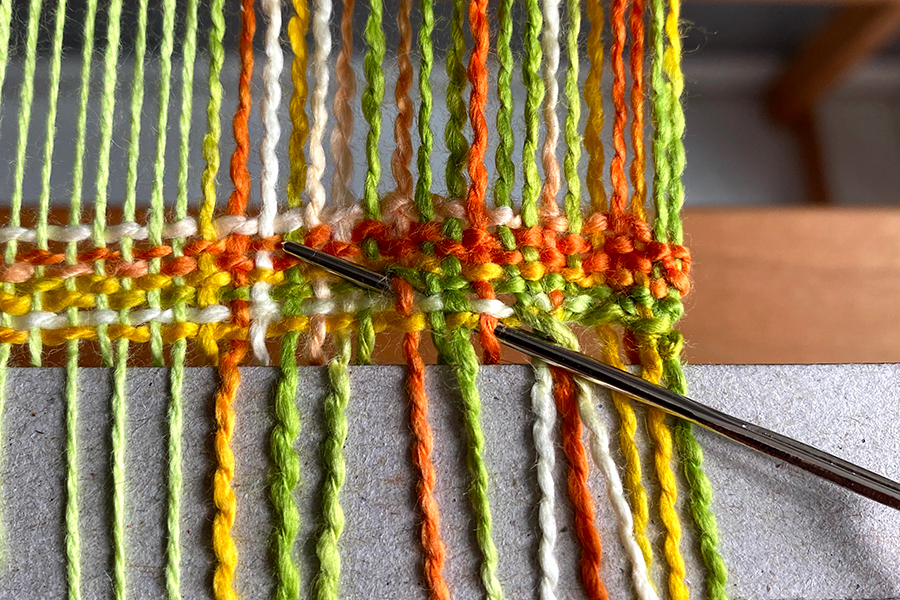
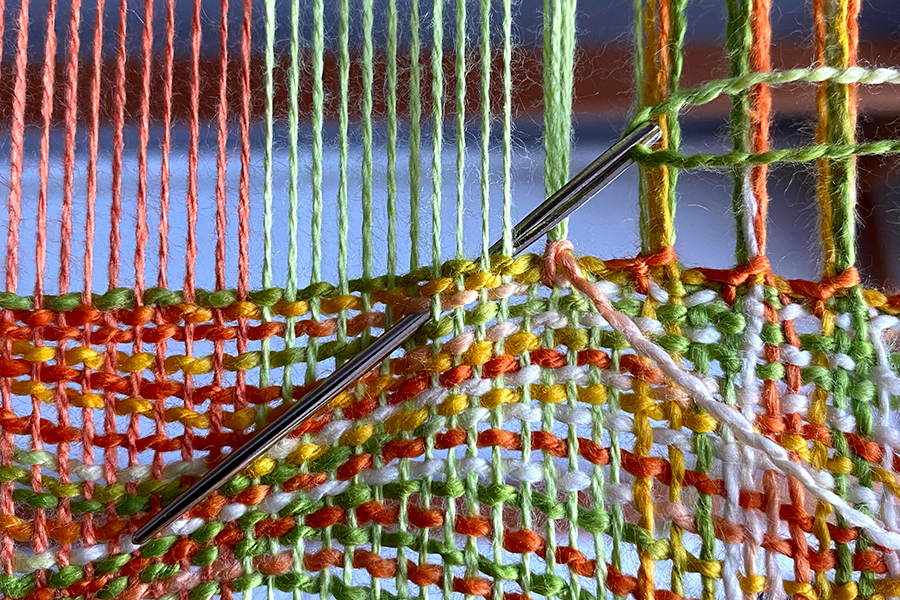
- Step.1a
-
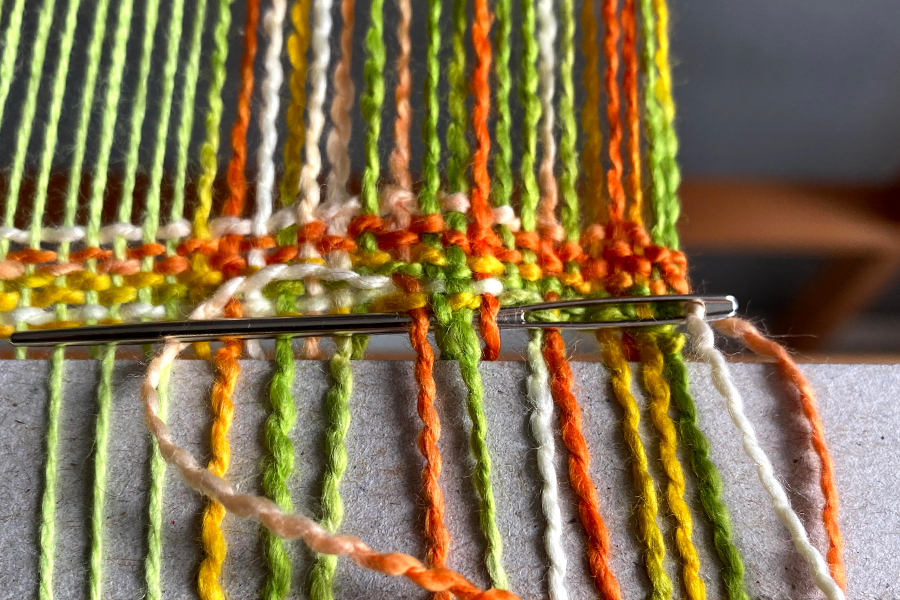
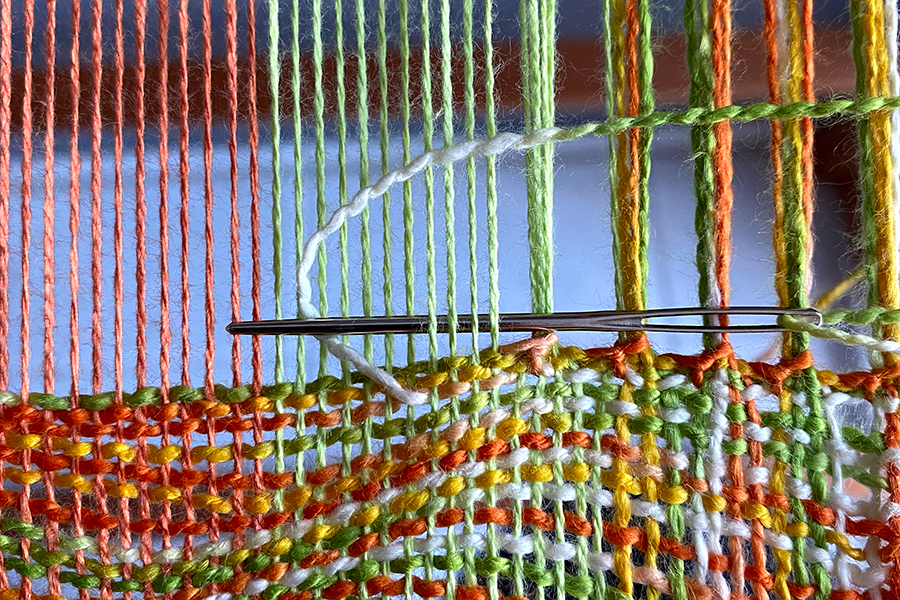
- Step. 2a
-
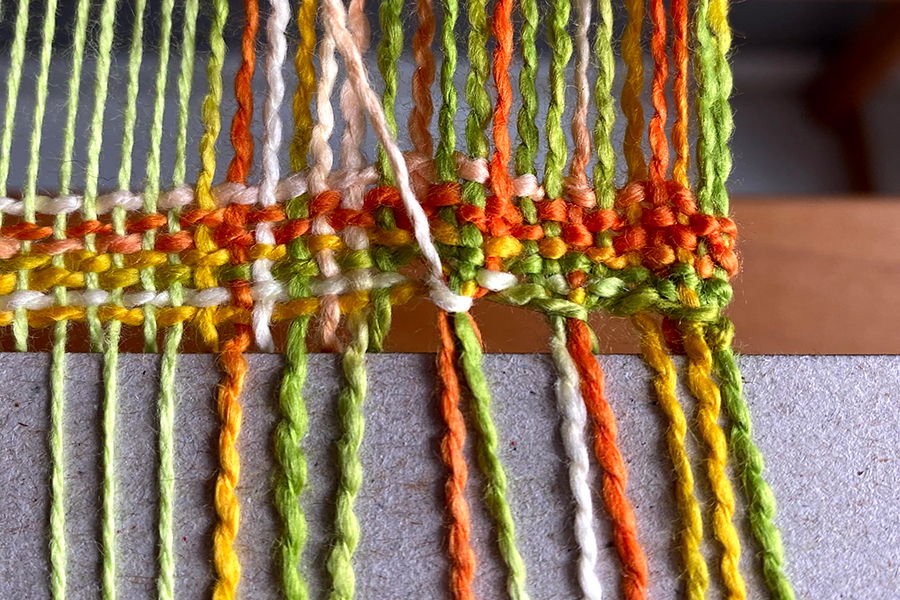
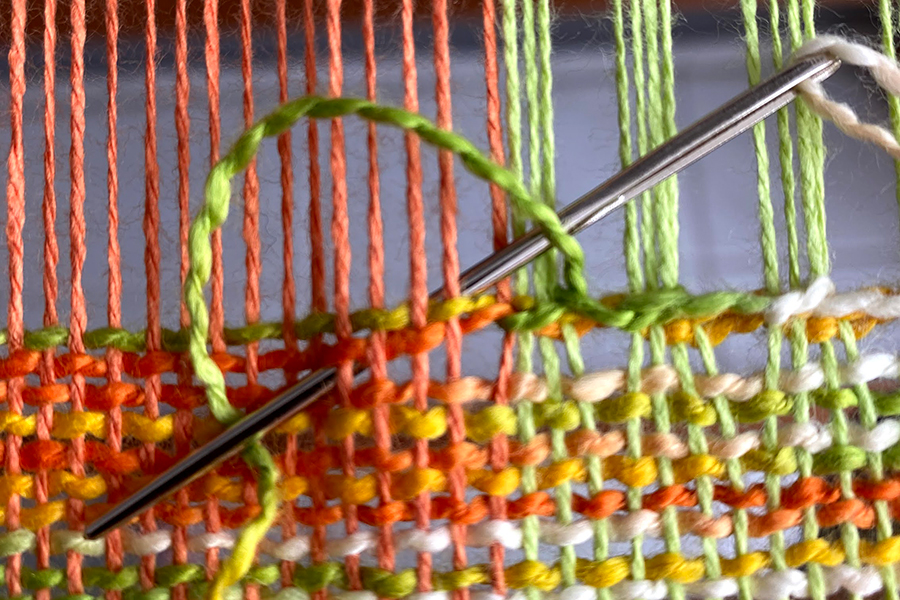
- Step. 3a
-
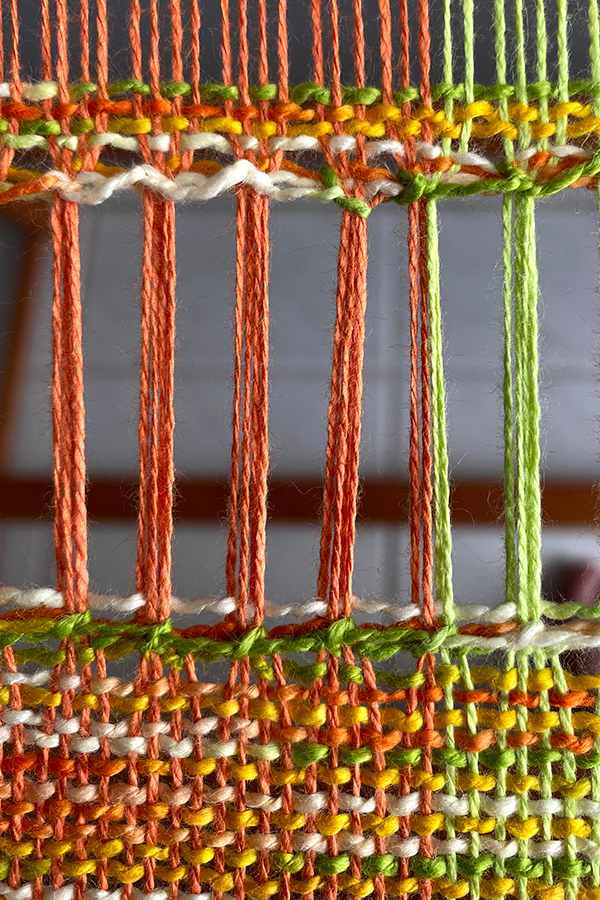
- Step. 1b
-
- Step. 2b
-

- Step. 1
-
- Step. 2
-
- Step. 3